
It seems rather obvious that modern applications should be structured in a way that permits an easy deployment to existing cloud infrastructure, such as Amazon Web Services (AWS). In this article I will cover the Amazon solution, which is quite popular nowadays; there is, of course, also Google Computing Platform, which goes hand in hand with Amazon and offers more or less comparable core services, but let us focus on AWS for starters.
While most new designs are usually service-based to reuse maximum of AWS or 3rd party offered services, the majority “old school” applications aren't. Typically those are monolithic, easily recognizable by a 130 megabyte WAR file. For such applications it is recommended to go to the cloud in an “as is” mode. In order to do so, AWS offers a very flexible virtualization service: Elastic Compute Cloud (EC2). It is hardware-based virtualization, based on Intel VT technology – at least as far as Amazon web site will tell you.
But first things first, let’s start with a DNS setup.
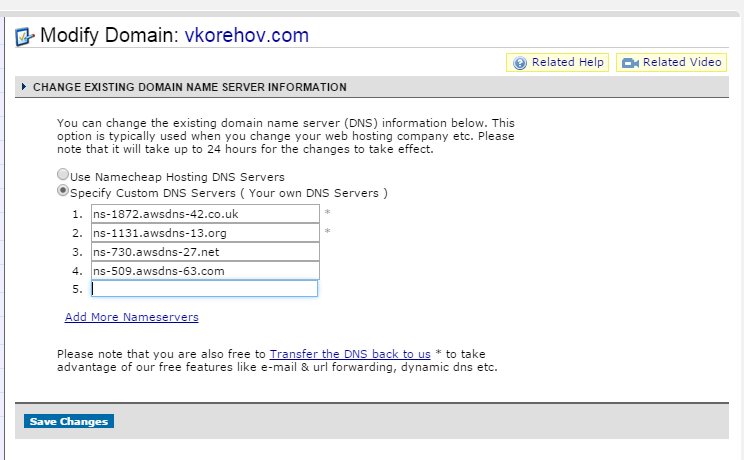
You probably have a domain registered for your website already (I, for the purpose of this overview, will be using my vkorehov.com), so all you need to do is to hook Amazon to the DNS resolution process. Thus you will need to setup Route 53 DNS servers in your domain provider (NS type records):
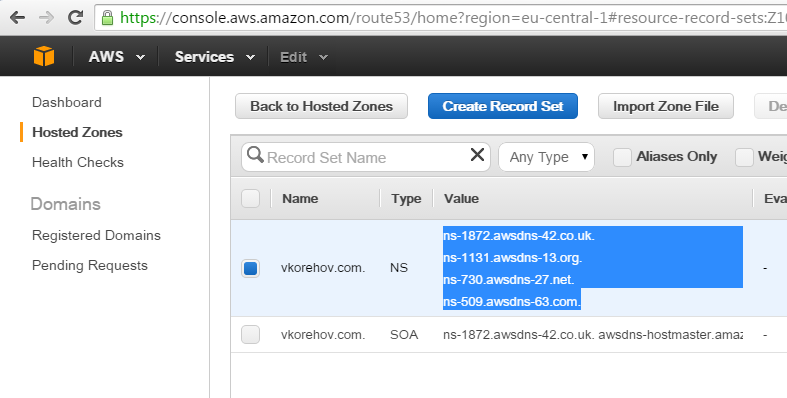
- Create a public hosted zone in Route 53 and take a record of generated NS records; in my particular case those look like this (but yours could be different):

- Now you will need to go to the management console of your DNS provider of choice and specify these 4 NS records there:
- Now grab a cup of tea/coffee, because DNS update will take some time (up to 24 hours, actually, so this needs to be planned accordingly).

Meanwhile, let’s talk about Route 53 for a while. As the name suggests it is a routing capable DNS system. It allows dynamic routing of clients to a nearest server, for example. Remember, we are talking about modern, cloud-deployed applications, and one property of such applications is that they can span continents easily and are usually hosted in different Regions to avoid latency, e.g. crossing Atlantics.
So the typical use case would be to setup Route 53 to give different results to clients based on their origin. You will need to create A records with Geolocation routing policy set to a Continent you would like this record to be resolved at:

Since this is a DNS-based system, it lets you specify any IP address here, not only Amazon-owned IP addresses, but even you current corporate address. This comes in very handy if you don't want to move some services to AWS just yet. Obviously, in this case you will need to be prepared to host your services in subdomains, e.g.: mail.vkorehov.com, which is best practice anyway.
Last interesting feature is health check (periodic heartbeat, typical for all Amazon-hosted servers/services). Route 53 will automatically omit records, which fail health check, so you can create error resilience even on the DNS level – nice feature, unavailable in the ordinary DNS.
But Route 53 aside, it’s time to create our first EC2 instance, and the key thing to start with is security. At a time of account registration, you were provided with these two important keys:
- Access key ID (example: AKIAIOSFODNN7EXAMPLE)
- Secret access key (example: wJalrXUtnFEMI/K7MDENG/bPxRfiCYEXAMPLEKEY)
Those two keys are used mainly in AWS Scripting, they should not change frequently, but they will change if you decide to migrate your cloud to a different Amazon account. You put them in your environment variables, and AWS Java or Python API would use the keys transparently if you call any of the Amazon "infrastructure" functions, like listing your virtual machines, attaching/detaching volumes, etc. Here we are going to use AWS web-based console mostly, so you won’t need those keys right away, but keep in mind that all of this and even more can be done from the command line or using Java / Python API.
EC2 is a very powerful concept by itself, since it lets end users share and contribute to AWS, and even sell their pre-setup virtual machines via the AWS market. To setup your EC2 instance, you pick a standard instance image first (with the latest Red Hat Linux, for example), and then you customize it to your needs, install software, like on any “normal” machine; you can even disconnect/connect volumes/disks and boot from different disk if you managed to mess something up. As soon as you are happy with the setup, you take a snapshot.
Each snapshot can be converted to an AWS image, which you can share between accounts, sell on a market or instantiate in a different Region (you will need to copy it Region-to-Region, however). From cost and administration perspective it is not very practical to have more than a single image hosted per system (so I would not recommend creating dozens of images, just for separation of concerns, etc.) Instead you could co-locate some closely coupled things on a single image, for example it could be a good idea to co-locate NGINX reverse proxy and Tomcat on a same image. Amazon already has load balancers, so you don't need to care about that at least.
As you become more and more confident around AWS, you could use more cloud services directly vs. via the EC2 instances.
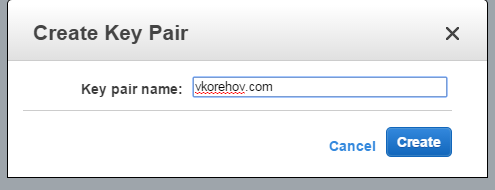
Now, before you can create EC2 instance, you will need to create an SSH key pair (not to be confused with access key ID / secret access key from above), so make sure you have PuTTY (or alike) at hand. Amazon claims that it doesn't store private key after it is generated and you have to store it privately and securely yourself. Amazon then provisions corresponding public keys for you in the usual Unix ~/.ssh/ directory.
For MS Windows, your password is derived from SSH key and can be generated from AWS console any time; here we won't use Windows, since it is twice as expensive in AWS. And in terms of Linux distributions, I would recommend using Amazon Linux flavor, simply because it is more frequently updated – compared with the other Linux flavors on EC2.
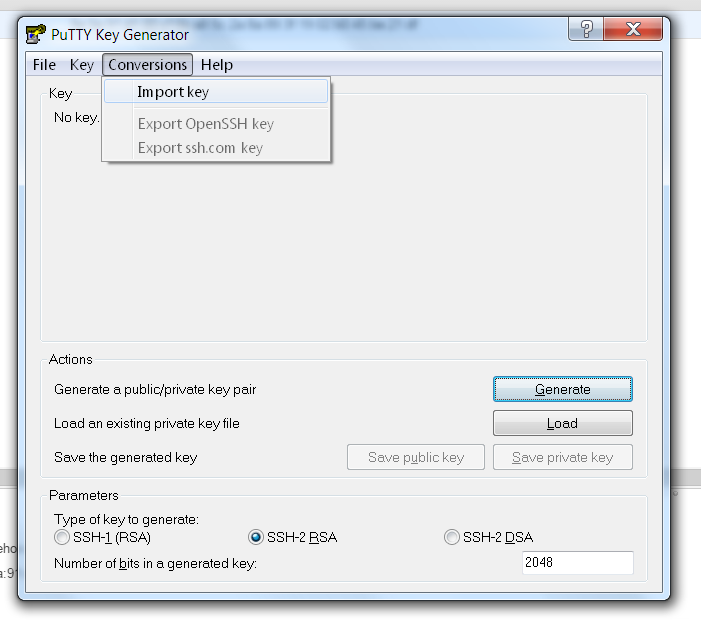
Let’s go ahead and create our SSH key pair:
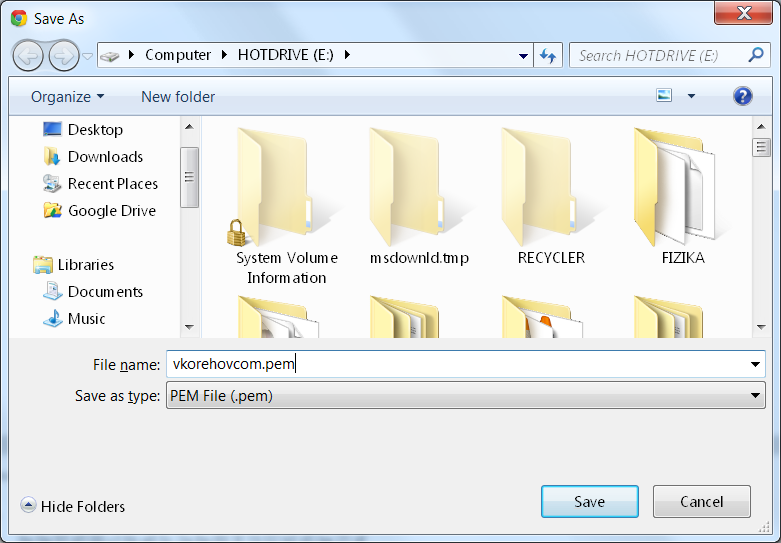
Save the private key in PEM format:
...and then use PuTTYgen to convert it to PPK format:
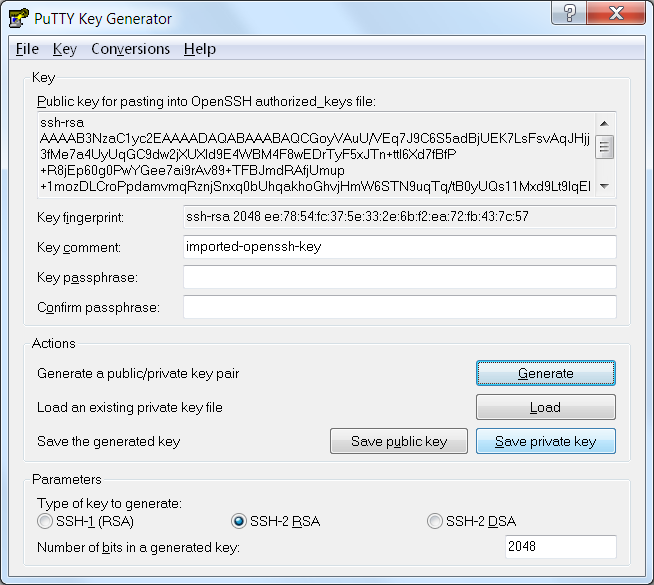
Now you can use this key with PuTTY to connect to your server securely. To continue, go to EC2 instances and create a new instance:


Next one is an important step, it has some interesting options:
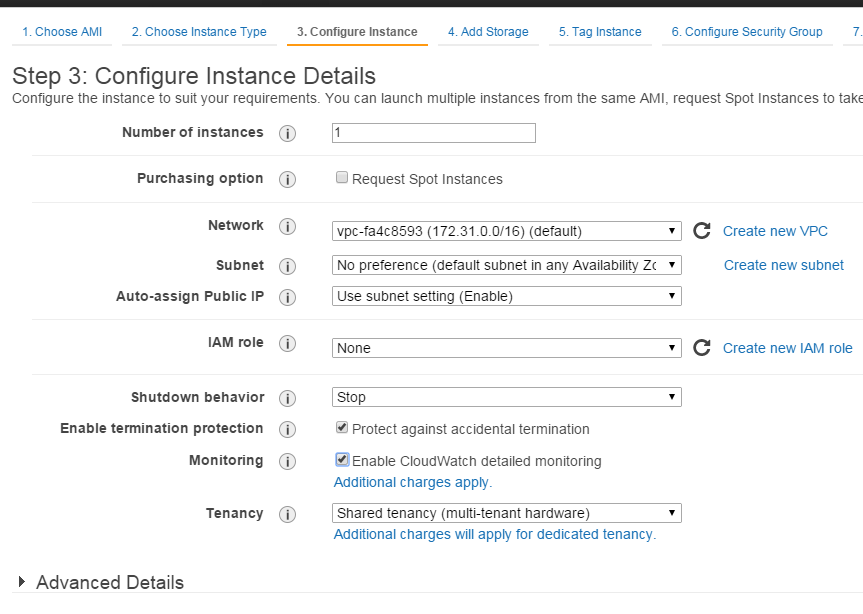
Request Spot instances checkbox is an AWS feature worth noting, as it allows to participate in an "auction" for hardware currently unused by Amazon: you can specify highest price you will accept, and if such a price becomes available you – will get the spot instance. Pretty much like automatic betting on eBay! It can be automated further, too – e.g., Jenkins CI server has a plugin to run continuous integration builds on AWS spot instances. Prices for spot instance are usually only 50%...25% of the full price, so given the volume that might be very much worth the effort.
Protect against accidental termination simply enables an auto-restart in case of kernel crash. CloudWatch is an Amazon service, which collects telemetry about running instances, but it doesn't have any knowledge of what is inside of the virtual machine, so it only monitors generic parameters, such as disk space, CPU usage, memory, etc.
AWS has a powerful role-based system with a quite flexible role setup for users (hence the options like IAM role), but we don't need to worry about this for now.
As far as IP address goes, by default you will get a public, but pooled and, therefore, intermittently changing IP address, which is free. You can buy/rent a constant public IP from Amazon (you cannot assign your corporate IP though) – this feature is called Elastic IP, but, again, this is not something that we will require in this case.
Resource usage minimization is one of the key concepts in cloud computing: basically you take / give back things dynamically, as much as possible, and this allows for a greater cost saving, especially in the long run. One of the bestseller features in AWS is server count rampup and rampdown during peak hours. This allows saving a lot on hosting of traffic-intensive systems.
At this point I will skip a few straightforward screens, and talk about security setup in a bit more detail:

In this so called Security Group setup, one can see an important warning. Once you complete this step, your machine becomes accessible to whole of Internet. Many are not too comfortable about this, but there is an obvious solution: to limit access in security group by source IP address (which you can get if you type: 'what is my IP address' in Google). So during the development of your cloud application you can limit access only to your IP address and then, after the development is over and you are confident that the application is production ready, you can remove this limitation.
If you are a bit more paranoid, you might want to setup a Virtual Private cloud, which will simply deny any public access to your cloud from the Internet, including your computer. For it to work you will have to setup VPN or Direct Connect (pricey!) to Amazon. All access to your services would then require Public-to-Private gateway setup in VPC. And it will basically create a setup similar to the default Amazon one, but with a few more boilerplate steps.
It is still a good idea to have VPN setup to call some backend servers which you still cannot move to the cloud for some reason. Don't do it for databases though, network latency will be killing you! Relational databases need to be migrated to RDBMS AWS services first, which saves you from administration hassle (Amazon would manage those DBs better than an average company would, anyway).
By the way, apart from RDBMS, Amazon offers you managed NoSQL databases as well.
Another important thing about cloud computing is outsourcing of application components. With that, you can implement full text search in minutes without writing any code at all! This is a very valuable benefit of the cloud, since implementing such searches on your own is rarely done right, and most certainly not that efficiently.
Now you can hit Next and start your machine, it takes about 30 seconds to start:

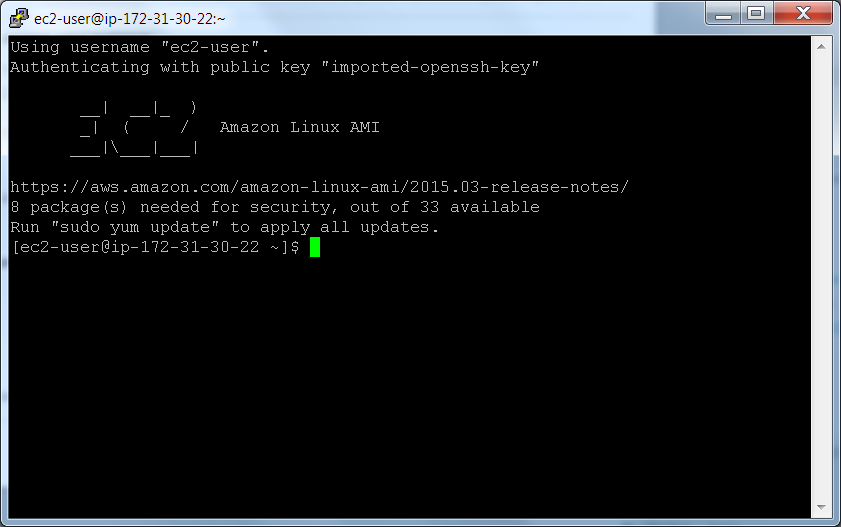
Once it is done, right click and connect to your instance:
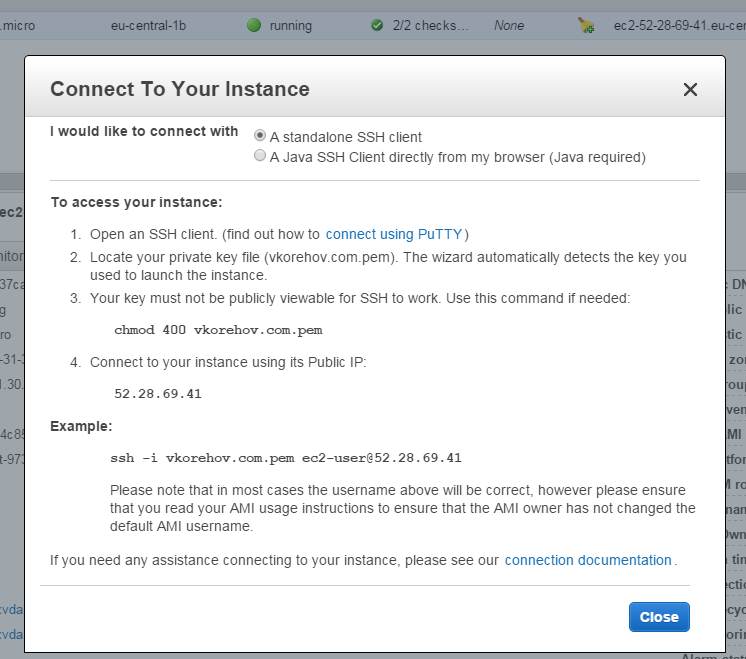
Ok, we are in:
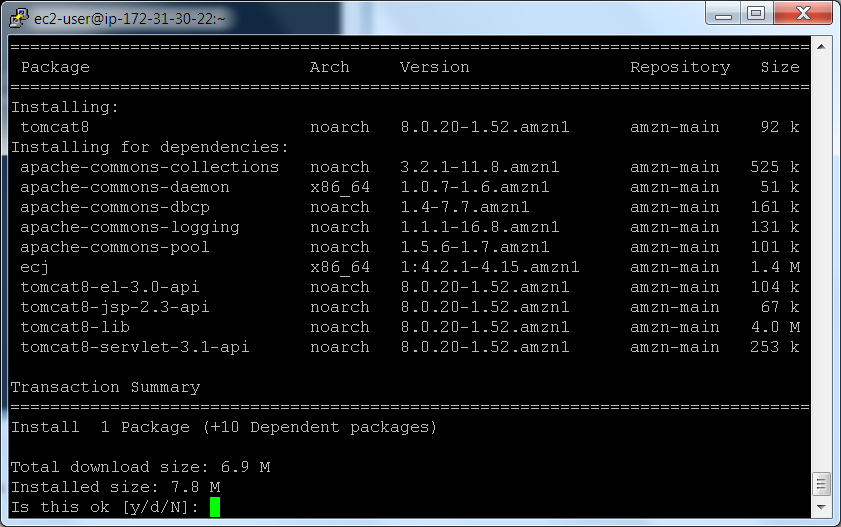
Apply updates, as suggested: sudo yum update. Then, since we will need a tomcat server for a “hello world” kind of demonstration, do a sudo yum install tomcat8:
Your web applications are here: /var/lib/tomcat8/webapps; let’s create a simple index.jsp, taking it from here: https://www3.ntu.edu.sg/home/ehchua/programming/java/JSPByExample.html:
[ec2-user@ip-172-31-30-22 webapps]$ sudo nano index.jsp

[ec2-user@ip-172-31-30-22 webapps]$ ls -al

total 12

drwxrwxr-x 2 root tomcat 4096 May  3 18:00 .

drwxr-xr-x 3 root tomcat 4096 May  3 17:55 ..

-rw-r--r-- 1 root root   1509 May  3 18:00 index.jsp

[ec2-user@ip-172-31-30-22 webapps]$ sudo chown root:tomcat index.jsp

[ec2-user@ip-172-31-30-22 webapps]$ ls -la

total 12

drwxrwxr-x 2 root tomcat 4096 May  3 18:00 .

drwxr-xr-x 3 root tomcat 4096 May  3 17:55 ..

-rw-r--r-- 1 root tomcat 1509 May  3 18:00 index.jsp

[ec2-user@ip-172-31-30-22 webapps]$ sudo mkdir ROOT

[ec2-user@ip-172-31-30-22 webapps]$ sudo mv index.jsp ROOT/

[ec2-user@ip-172-31-30-22 webapps]$ sudo chown root:tomcat ROOT
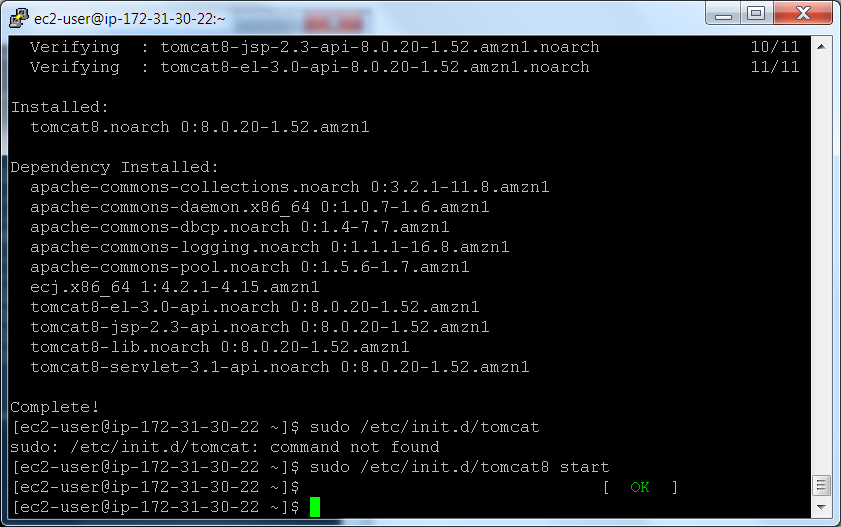
Check that tomcat is listening on port 8080:
[ec2-user@ip-172-31-30-22 webapps]$ netstat -an | fgrep 8080

tcp        0      0 :::8080                     :::*                        LISTEN
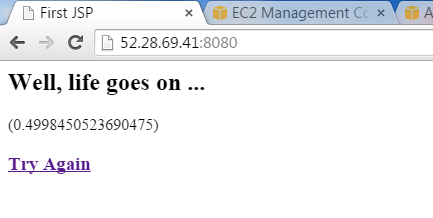
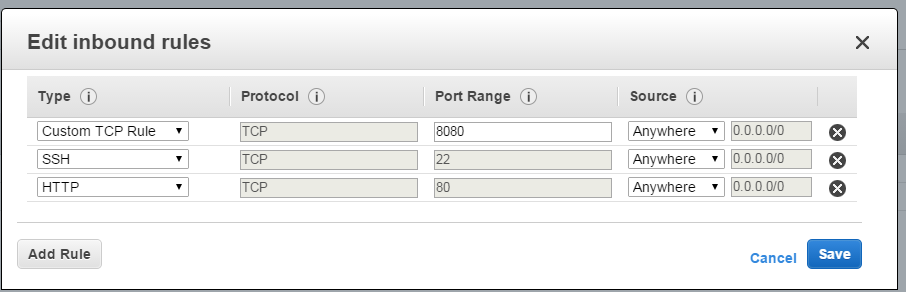
Now we will need to go and allow inbound traffic for 8080 in order to test our index page:

Save it, and hit the browser with http://52.28.69.41:8080/ (well, that was the address in my particular case, yours would most certainly differ) to test your index page. If everything works as expected, you should see something like this:
Moving on, let’s setup Elastic Load Balancer (ELB) in AWS in order to have a cluster of one node (you probably want more than one, but this would do perfectly for the demonstration purposes). Here you specify port mapping from 80 to 8080:

Make sure you specify the same security group you used to start your EC2 instance, for simplicity (note, we already added port 8080 there, but we still need to add port 80!)

Here is an interesting step:
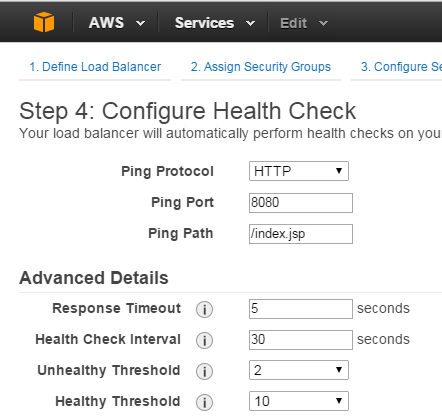
That’s our health check (we saw it in Route 53 some time before). In Amazon it is common to have such health checks to let Amazon know about your instance status, it is very common to have some Python-based cumulative health check implemented in an instance, which will verify database connectivity, web server status, reverse proxy status, application deployment status, etc.
If Amazon detects that one of the servers is not passing 2 (or another number you configure) of consecutive checks, it will take the instance out of balancer and will put it back after 10 consecutive successful checks, which can take some time, so be patient.
It is very handy to still have access to application instance directly using 8080 port for troubleshooting purposes (limited to your company’s source IP address, of course). It is important to understand that health check only cares about receiving HTTP status 200, i.e. it doesn't analyze responses, etc.
Add EC2 instance here:

At the bottom of the page, there are two new checkboxes:
- In Enable Cross-Zone Load Balancing, “Zone” means "Availability Zone", yet another important cloud computing concept. Even though your application can be multi-region (e.g., Europe and US), Amazon still recommends deploying your instances to at least two zones within a region. This will allow to work around Internet provider failures, which occur from time to time with most of Internet providers, Amazon's IPs are not an exception.
- Enable Connection Draining is a new option, which lacked in AWS until recently; it allows graceful deregistration of EC2 instances from load balancing. Earlier Amazon insisted that you need to implement HTTP session replication using ElastiCache (based on memcached and has tomcat Session Management plugin from Amazon) if you would like to achieve zero downtime scale down of instance count (used in AutoScaling, for example, or during manual de-regestration).
It will take some time to detect your single instance as healthy, so be patient here as well (remember about 10 successful checks in a row). In the meantime go to security group and allow incoming traffic on port 80:
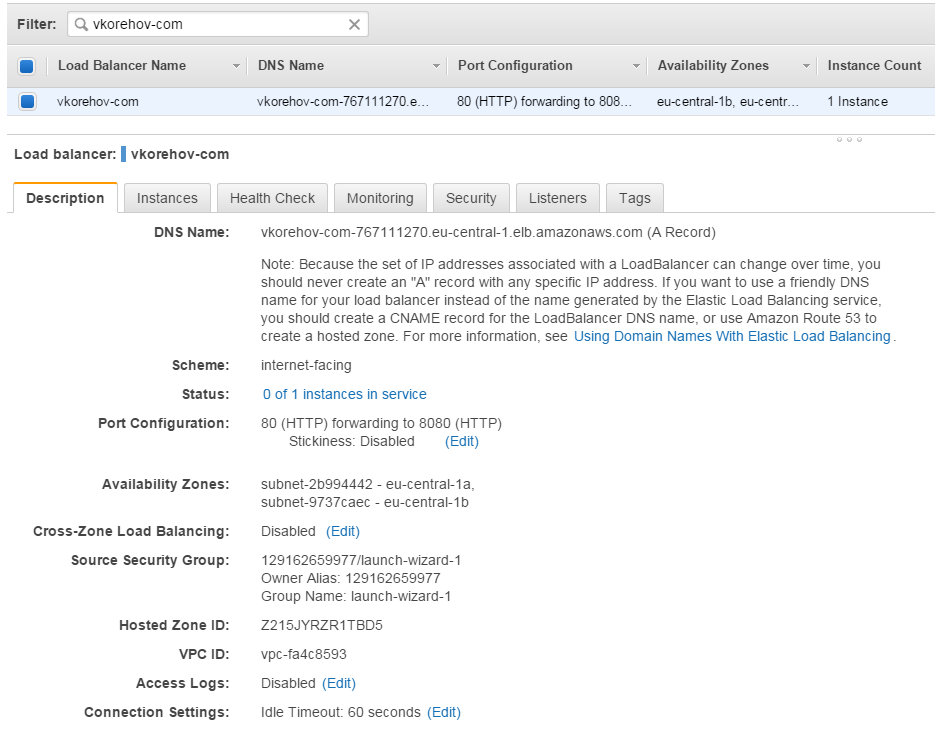
You can use "generated" DNS of ELB to check that our “hello world” application is now accessible through ELB, i.e. via http://vkorehov-com-767111270.eu-central-1.elb.amazonaws.com:
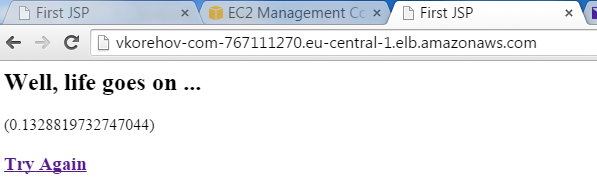
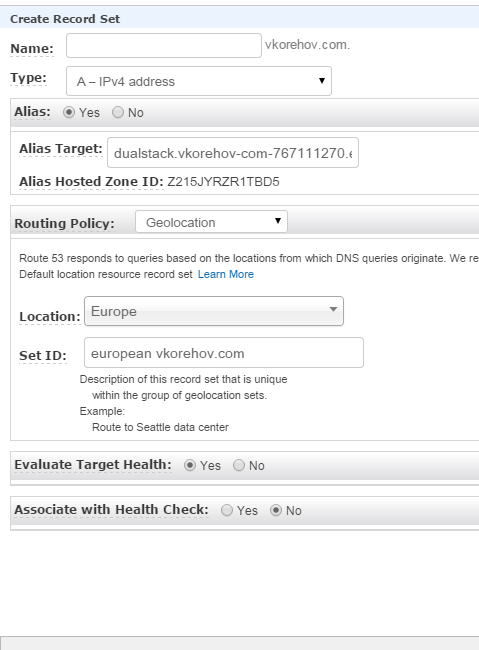
And it works! Ok, now the final step is to add an A record in Route 53 and we are done for today:
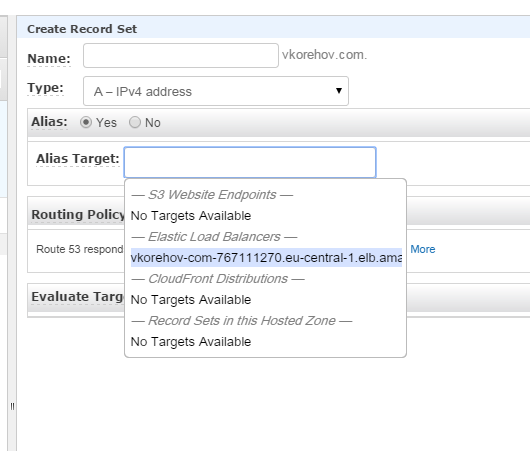
It is important to select Alias option, as opposed to direct IP entry. Also, let’s try Route 53 Geolocation feature, and we will resolve this A record only for Europe:
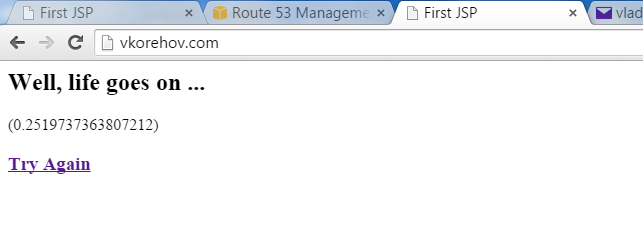
Now, finally vkorehov.com works as intended:
EC2 instances won’t cost you anything for the first 3 months (Amazon promotes most of their services by allowing free initial usage), but then you will get charged at a rate of about 25€ a month for a single Linux micro-instance; check here for more information on pricing. But if you need assistance with developing cloud applications or migrating to the cloud – don’t hesitate to contact us!
 |
About the author: Vladislavs Korehovs has joined Idea Port Riga just recently, but his overall Java background spans 11 years, making him an expert in Java, J2EE and Spring framework. Vladislavs now focuses on mission-critical aspects, such as memory leaks, transaction management, performance, etc. – bringing in his problem solving skills and a drive for minimalistic system architecture. |


